Monday, December 25, 2017

Kotlin for Android


Kotlin is an opensource language with its own community and documentation, Kotlin is the better fit for developing Android applications, Kotlin does not provide any restriction while using in android platform.


Major reasons why Google introduces Kotlin to android


Compatibility : Kotline applications can run on older versions of android without  any restrictions, also kotlin tool is fully supported into Android studio and compatible with android build system

Performance : Kotlin also has bytecode structure as like Java. With kotlin support for inline functions code using lambads often runs even faster than the same code written in java


Interoperability (Able to switch) : Kotlin is 100% interoperable with java, allowing using the all android libraries in kotlin application, this includes annotation processingm, so databinding and dagger work too.

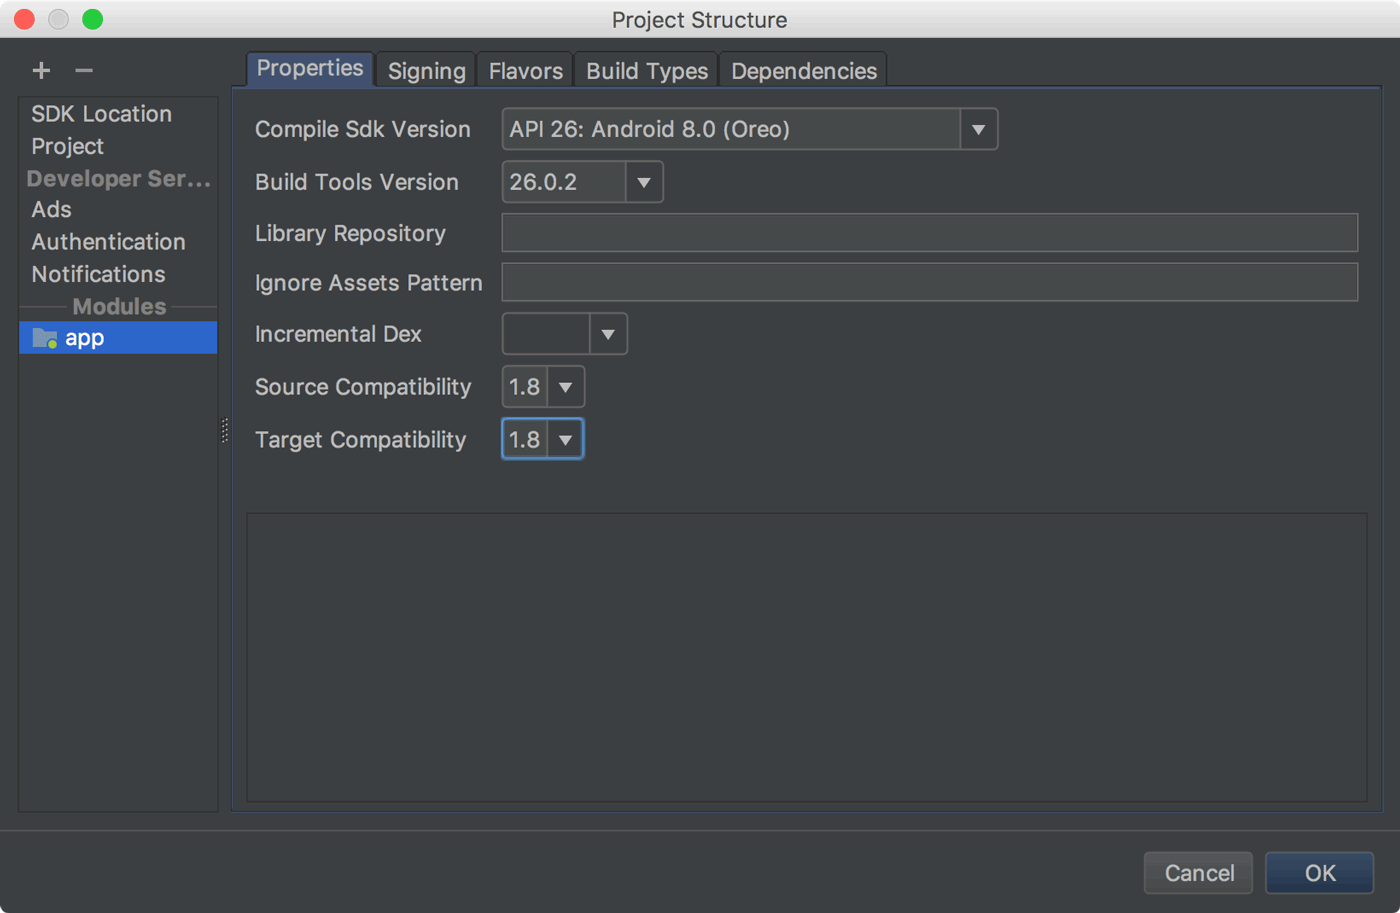
Compilation Time : Kotlin support incremental compilation, so some additional overheads for clean builds.


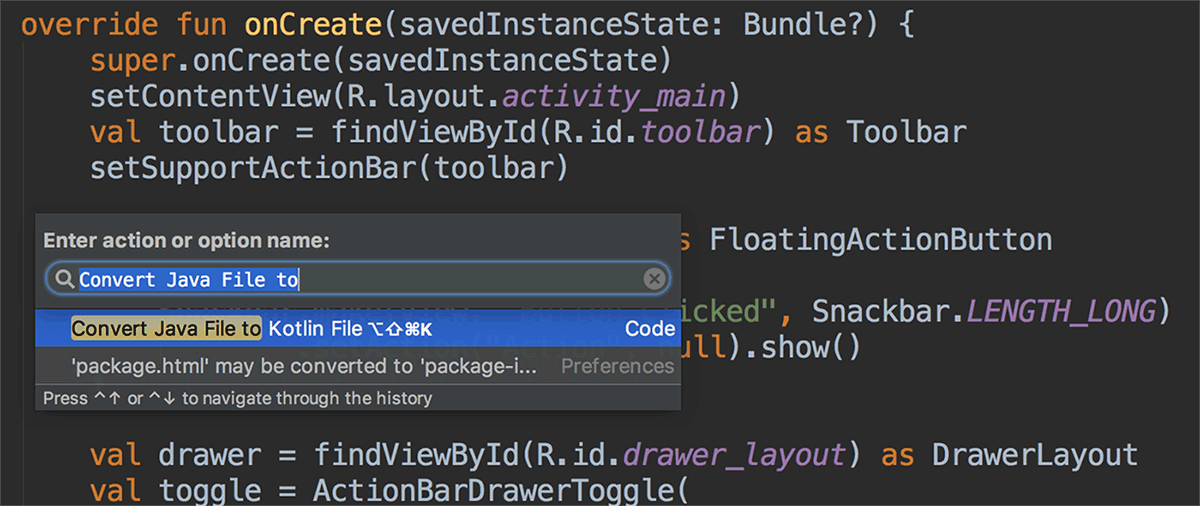
Installing the kotline plugin


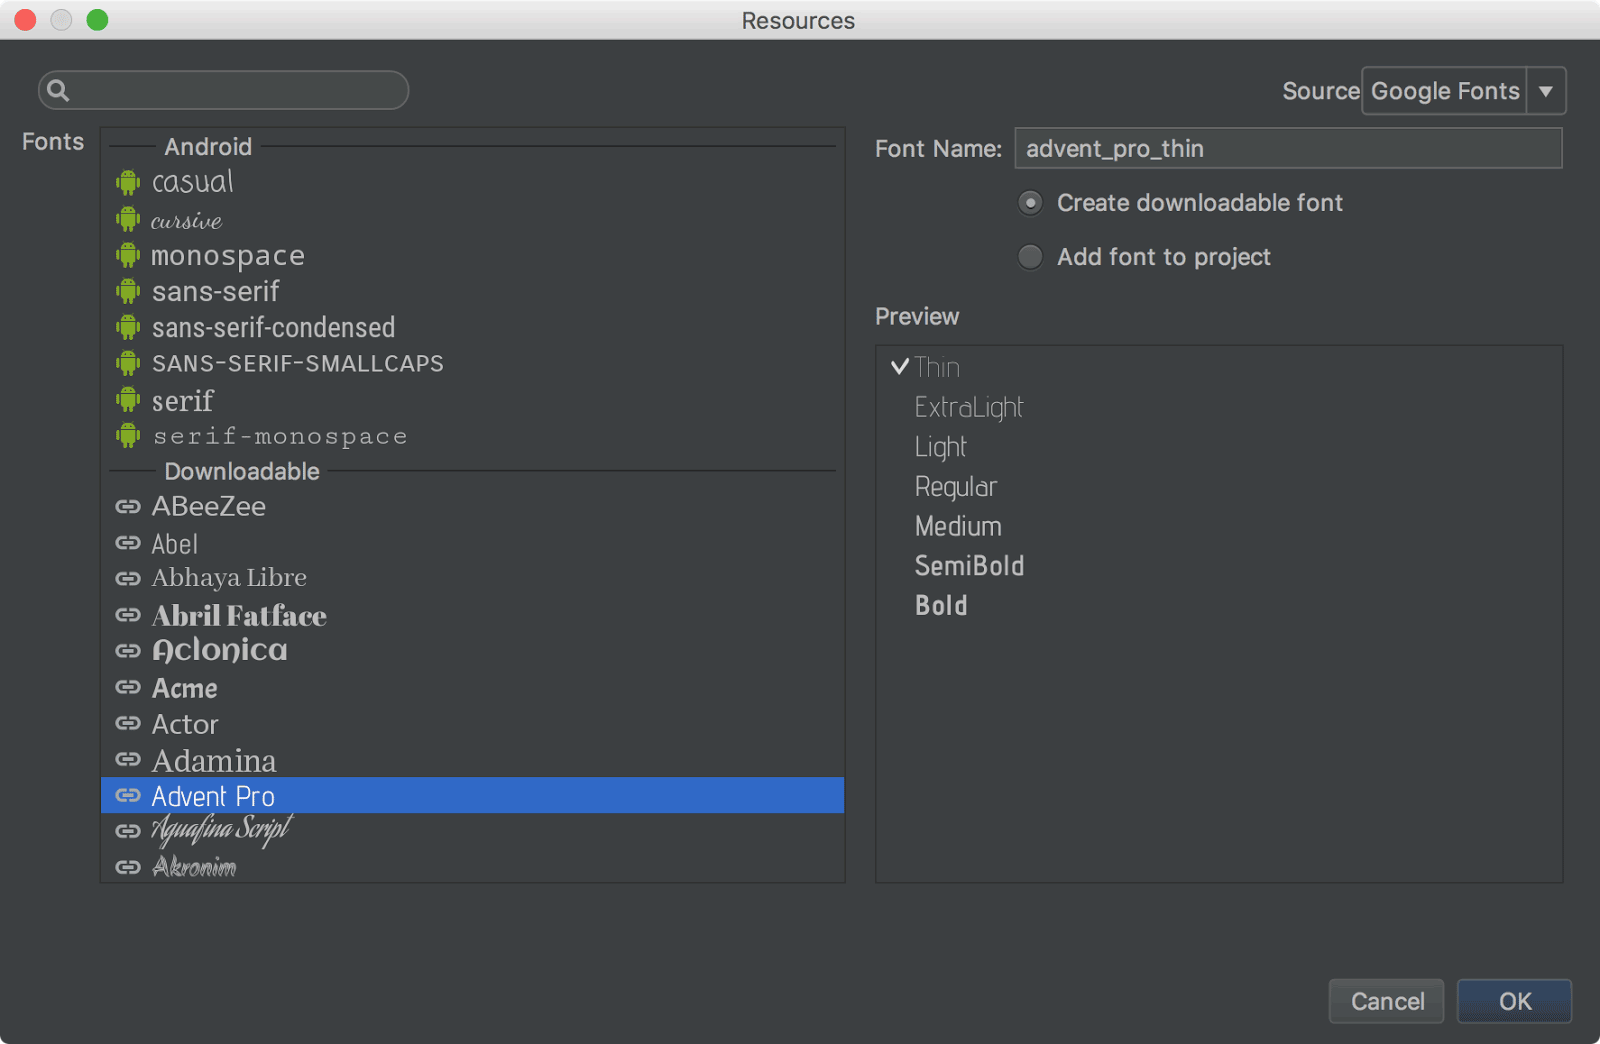
kotlin plugin is bundled with Android Studio 3.0, if you're using the earlier version you have to install manually,

Goto Preferances > Plugin > Browse Repositories > type Kotlin > Install 

Safer Code 

Write safer code and avoid NullPointerExceptions in your app.

var output: String
output = null   // Compilation error
==================================

val name: String? = null    // Nullable type
println(name.length())      // Compilation error
Readable and Concise 

Focus on expressing your ideas and wirte less boilerplate code.

// Create a POJO with getters, setters, equals(), hashCode(), toString(), and copy() with a single line:
data class User(val name: String, val email: String)

Lambdas

Use lambdas to simplify your code.


button.setOnClickListener(new View.OnClickListener(){
    @Override
    public void onClick(View v){
        doSomething();
    }
});


button.setOnClickListener { doSomething() }
          
Default and named arguements

Reduce the number of overloaded functions by using default arguments.
Call functions using named arguments to make your code more readable.


fun format(str: String,
           normalizeCase: Boolean = true,
           upperCaseFirstLetter: Boolean = true,
           divideByCamelHumps: Boolean = false,
           wordSeparator: Char = ' ') {
        
    }
==================================
// Call function with named arguments.
format(str, normalizeCase = true, upperCaseFirstLetter = true)
Say Goodbye to findViewById

Avoid  findViewById() calls in your code. Focus on writing on your logic with less verbosity.


import kotlinx.android.synthetic.main.content_main.*
class MainActivity : AppCompatActivity() {

    override fun onCreate(savedInstanceState: Bundle?) {
        super.onCreate(savedInstanceState)
        setContentView(R.layout.activity_main)
        // No need to call findViewById(R.id.textView) as TextView
        textView.text = "Kotlin for Android rocks!"

    }
}
   

Extend functionality without inheritance


Extension functions and properties let you easily extends functionality of classes without inheriting from them. calling code is readable and natural.


// Extend ViewGroup class with inflate function
fun ViewGroup.inflate(layoutRes: Int): View {
    return LayoutInflater.from(context).inflate(layoutRes, this, false)
}
==================================
// Call inflate directly on the ViewGroup instance
override fun onCreateViewHolder(parent: ViewGroup, viewType: Int): ViewHolder {
    val v = parent.inflate(R.layout.view_item)
    return ViewHolder(v)
}
 
100% Interoperable with Java

Add as tittle or as much of Kotlin as you want. Kotlin is a JVM language that's completely interoperable with Java.


// Calling Java code from Kotlin
class KotlinClass {
    fun kotlinDoSomething() {
        val javaClass = JavaClass()
        javaClass.javaDoSomething()
        println(JavaClass().prop)
    }
}
==================================
// Calling Kotlin code from Java
public class JavaClass {
    public String getProp() { return "Hello"; }
    public void javaDoSomething() {
        new KotlinClass().kotlinDoSomething();
    }
}


Building and Publishing the Kotlin application for android

This works same wa as in java. You can make a release of the application and sign in similarly to way what you do applications written in java

Kotlin has a rather small runtime file size :  the library is approximately 932KB. this means kotlin adds just a little to .apk file size.

Kotlin compiler produces bytecode, thus there really no-difference in look and feel of kotlin applications verses those written in java


Saturday, December 23, 2017

Monday, December 11, 2017

Data Structure and Algorithms in Java


Data Structures :


It is a container of data. It let us store data more effectively. Execution and manipulation of data become's more easy and fast with the help data structures. It provides a bunch of ways to store data.

Large projects contain complex requirements, those projects need to be faster and user-friendly. There are many requirements those can't be implemented without data structures. Data structures provide many algorithms to do so.

Topics

  • Stack
  • Queue
  • Linked List
  • Sorting
  • Hash tables 
  • Trees
  • Application Development

Stack :
Is the linear data structure which follows the order in which the operations 

are performed .
The major operations which performed in Stacks are
  • Push : Used to insert the data
  • Pop : Used to access the data
  • isEmpty : Used to check whether the stack is empty

There are two ways to implement stacks 
1. Array
2. LinkedList


Sample example on Stack using array:
package datastr;
public class InStack {
private int [] stack;
private int top;
private int size;
public InStack(){
top=-1;
size= 50;
stack= new int[50];
}
public InStack(int size){
top=-1;
this.size=size;
stack =new int[this.size];
}
public boolean push(int item){
if(!isFull()){
top++;
stack[top]=item;
return true;
}else{
return false;
}
}
public int pop(){
try {
return stack[top--];
} catch (Exception e) {
// TODO Auto-generated catch block
e.printStackTrace();
return -1;
}
}
public boolean isFull(){
return(top== stack.length-1);
}
public boolean isEmpty(){
return(top== -1);
}
} ********************************************
package datastr;
public class Main {
public static void main(String[] args){
InStack inStack = new InStack();
if(!inStack.isFull()){
inStack.push(2);
inStack.push(4);
inStack.push(6);
inStack.push(9);
}
System.out.println(inStack.pop());
}
}

Queue :

Queue is an another type of data structure, the way of storing and retrieving the data from queue first in and first out.

The major operations performed on Queue are :


  • Enqueue : Adds the item to queue
  • Dequeue : Removes the item from queue
  • Front  : Item at first index 
  • Rear : Item at last index


Wednesday, November 29, 2017

Wifi debugging in Android Studio

Intellij and Android Studio plugin are created to quickly connect your device over wifi to connect to install, run and debugging without using USB connected. 

Here are steps to install plugin to Android Studio

 > Click on Android Studio from top right corner

> Click on Preferences, Opens up new window manager


> Click on Plugins > Click on Browse repositories search as ADB wifi

> Tap on install button, once install's successfully, it show up new icon for Wifi ADB.

> Your phone will get detected and get's connected over wifi/hotspot and hence now you may disconnect USB.

>It will save our time in irregular connection and also remedy for short length USB cable. 

Sunday, November 19, 2017

Thursday, November 16, 2017

FileProvider in Android Nougat

FileProvider is a special sub-class of ContentProvider class helps in secure sharing of files associated with an app by creating a content:// Uri for a file instead of a file ://Uri

A content Uri allows you to grant read and write access using temporary access permission. When you create an intent containing a content URI, in order to send the content URI to client app, you can also call intent.setFlags() to add permissions. This permissions are available to client app as long as the stack for a receiving Activity is active. For an intent going to a service , the permissions are available as long as the service is running


 Defining a FileProvider

Since the default functionality of FileProvider includes content uri generation for the file, you don't need to define a subclass in code. Instead you can include a fileprovider in your app by specifying it entirely in XML. 


<manifest>
    ...
    <application>
        ...
        <provider
            android:name="android.support.v4.content.FileProvider"
            android:authorities="com.mydomain.fileprovider"
            android:exported="false"
            android:grantUriPermissions="true">
            ...
        </provider>
        ...
    </application>
</manifest>
If you want to override any of the default behaviour of FileProvider methods, extend the FileProvider class and use the fully qualified class name in the
android:name attribute of the <provider> element

android:authorities > set to a URI authority based on domain you control;
if you use the same authorities for different apps, while installing it may through an exception to uninstall existing app which has same authority

android:exported > set to false, File provider does not need to be public

android:grantUriPermissions > set to true, to allow you to temporary access to files.


Specifying Available Files

nt A file provider can only generate content URI for files in directories that you specify beforhand
<paths xmlns:android="http://schemas.android.com/apk/res/android">
    <files-path name="my_images" path="images/"/>
    ...</paths>

Monday, October 30, 2017

Whats new in Android Studio 3.0

Android Studio is the official tool for developing Android applications, includes everything we need.

To get the latest version of android studio click 
Help > Check for update (on Mac, Android Studio > Check for updates).

If you're the MAC user you'll face the following issue, just click cancel and continue.


The primary purpose of the 3.0 is to improve the build performance for that projects which have a large number of modules. When using this plugin with large project. you should experience the following updates 

  • Support for android 8.0
  • Support for Java 8 libraries and Java 8 language features (without the Jack compiler).
  • Improved Gradle Sync speed
  • AAPT2 is now enabled by default in
  • Kotlin Support
  • Supports the device file explorer

    To open 
    click View > Tool Windows > Device File Explorer.
  • Supports developing intant apps

  • Supports the adaptive icons for launching the androids apps in 8.0
    to start,
     right-click on the res folder in your project, and then click New > Image Asset. In the Asset Studio window, select Launcher Icons (Adaptive and Legacy) as the icon type.
          
  • Supports for font resources, you can choose various inbuilt font resources for your Android projects, instead of adding manually onto font folder


  • Added Google Moven repository./
    Android studio now uses Google's moven repository by default instead of depending on Android SDK manager to get updates for Android support library, Google play services, Firebase and other dependencies
    allprojects {
        repositories {
            google()
        }
    }
  • Native debugging with windows-32 no longer supports.
    in case if developers chooses to debug apps using window-32 they can use 
    Android Studio 2.3.

Wednesday, October 25, 2017

Fingerprint Authentication


Android 6.0 Marshmallow offers new features for developers and user. This post will help developers to teach how to add Fingerprint authentications to apps.

There are several advantages of using the fingerprint authentications

> Fast and easy to use
> Secured : fingerprint uniquely identifies
> Online transactions are safer 

There are several steps you have to follow before using fingerprint, It could really seems quite complex but this post help you step by step.

* Verify that lock screen is secured by PIN, password or pattern
* Check at least on fingerprint is registered on your phone
* Get access to android keystore to store the key used to encrypt or decrypt an object

* Generate an encryption key and the cipher
* Start the authentication process
* Implement callback methods to handle authentication event

Pre-requisites Android SDK 26
Android build tool v26.0.1
Android support repository


Before starting our app should get permission to access the sensor and fingerprint from android core, It can be done by just adding permission tag in manifest.xml file

<uses-permission android:name="android.permission.USE_FINGERPRINT" /> 

Now we create mainActivity class to handle all authentication process.
FingerprintAuthenticationDialogFragment.java

Small helper class to manage text/icon around fingerprint authentication UI.

Friday, September 1, 2017

Reactive Native Sample App


What is reactive native ?Reative Native is an framework for designing the native mobile applications.
It is javascript code library developed by facebook available on Github from 2013

React Native helps the developer to reuse the code across web and on mobile
Ex : Facebook,

What platform the reactive native supports ?
IOS and Android

Saturday, August 26, 2017

Sunday, August 6, 2017

Mockito Framework

Mockito is a mocking framework, it is widely used the in unit testing JAVA application.

Unit testing is used to maintain & improve the quality of product through unit testing and test-driven development

Mocking is the process of testing the functionality of class in isolation.

Mocking does not require database connection or properties file read or file server read to test functionality. A Mock object returns some dummy data corresponding to some dummy input.

Mock object are nothing but proxy for actual implementation 

Tuesday, July 25, 2017

Monday, July 3, 2017

Data Binding Library


Data binding library are used to write declarative layouts and minimise the glue code necessary to bind your application logic and layouts.


Before start integration data binding, I would like to tell the some advantages of library.

Advantages of data binding library :

  • Offers flexibility and broad compatibility

  • Its a support library so we can use it with all android platforms

  • Removes the boiler plate code
  • Stronger readability 
librar


Tuesday, June 27, 2017

Android Launch Mode

Basically we could assign launch mode directly as an attribute of an
 
<activity>  tag inside AndroidManifest.xml Manifest file list:

<activity android:name=".SplashScreen"   
          android:configChanges="orientation|keyboardHidden|screenSize" 
          android:label="@string/app_name"   
          android:launchMode="standard" 
          android:screenOrientation="portrait"    
          android:theme="@android:style/Theme.Light.NoTitleBar.Fullscreen" >
    <intent-filter>
        <action android:name="android.intent.action.MAIN" />
        <category android:name="android.intent.category.LAUNCHER" />
    </intent-filter>
</activity>

There are 4 types of launch modes. Let c one by one.
An example of this kind of Activity is a Compose Email Activity or a Social Network's Status Posting Activity. If you think about an Activity that can work separately to serve an separate Intent, think about standard one.

standard


This is the default mode.

The behaviour of the activity set to this mode is a new activity will always be created to work separately with each intent sent.


gallerystandardl2
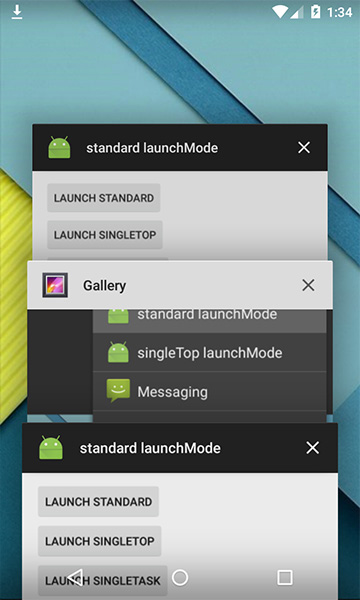
An example of this kind of activity is a Compose an Email Activity or a Social Network's status Posting activity.  If you think about an activity that can work separately to serve an separate Intent, think about standard one.

singleTop


The next launch which appears when you hit control+space is singleTop,


It acts almost same as standard one which means that singleTop Activity instance could be created as many as we want. Only difference is if there already is an Activity instance with same type at the top of stack in the caller task, There would not be any new activity created, instead an intent will be sent an existing activity instance through 
onNewIntent(); Method

Tuesday, June 20, 2017

Thursday, June 15, 2017

Android N changes


PERMISSIONS
(To be given runtime of application) supports heigher verisons of phone >23.0
PERMISSIONS
(To be given in app Manifest) supports older version <23.0
STORAGE

Used for runtime permissions related to the shared external storage.
android.permission.INTERNET
CAMERA

Used for permissions that are associated with accessing camera
or capturing images/video from the device.
android.permission.CAMERA
CONTACT

Used for runtime permissions related to contacts and profiles on this device.
android.permission.RECORD_AUDIO
LOCATION

Used for permissions that allow accessing the device location.
android.permission.MODIFY_AUDIO_SETTINGS
MICROPHONE

Used for permissions that are associated with accessing microphone audio from the device.
android.permission.BODY_SENSORS
PHONE

Used for permissions that are associated telephony features.
(GCM requires a Google account)
android.permission.GET_ACCOUNTS
SENSORS

Used for permissions that are associated with accessing camera
or capturing images/video from the device.
(Keeps the processor from sleeping when a message is received)
android.permission.WAKE_LOCK
SMS

Used for runtime permissions related to user's SMS messages.
(This app has permission to register and receive data message)
com.google.android.c2dm.permission.RECEIVE

android.permission.ACCESS_NETWORK_STATE


android.permission.VIBRATE


android.permission.READ_PHONE_STATE


android.permission.ACCESS_FINE_LOCATION


android.permission.SEND_SMS


android.permission.CALL_PHONE


android.permission.WRITE_EXTERNAL_STORAGE


android.permission.RECEIVE_SMS

android.permission.READ_CALENDAR

android.permission.WRITE_CALENDAR