Saturday, December 23, 2017

Monday, December 11, 2017
Data Structure and Algorithms in Java

Data Structures :
It is a container of data. It let us store data more effectively. Execution and manipulation of data become's more easy and fast with the help data structures. It provides a bunch of ways to store data.
Large projects contain complex requirements, those projects need to be faster and user-friendly. There are many requirements those can't be implemented without data structures. Data structures provide many algorithms to do so.
Topics
- Stack
- Queue
- Linked List
- Sorting
- Hash tables
- Trees
- Application Development
Stack :
Is the linear data structure which follows the order in which the operations
are performed .
The major operations which performed in Stacks are
- Push : Used to insert the data
- Pop : Used to access the data
- isEmpty : Used to check whether the stack is empty
There are two ways to implement stacks
1. Array
2. LinkedList
Sample example on Stack using array:
package datastr;public class InStack {private int [] stack;private int top;private int size;public InStack(){top=-1;size= 50;stack= new int[50];}public InStack(int size){top=-1;this.size=size;stack =new int[this.size];}public boolean push(int item){if(!isFull()){top++;stack[top]=item;return true;}else{return false;}}public int pop(){try {return stack[top--];} catch (Exception e) {// TODO Auto-generated catch blocke.printStackTrace();return -1;}}public boolean isFull(){return(top== stack.length-1);}public boolean isEmpty(){return(top== -1);}} ********************************************package datastr;public class Main {public static void main(String[] args){InStack inStack = new InStack();if(!inStack.isFull()){inStack.push(2);inStack.push(4);inStack.push(6);inStack.push(9);}System.out.println(inStack.pop());System.out.println(inStack.pop());System.out.println(inStack.pop());System.out.println(inStack.pop());System.out.println(inStack.pop());System.out.println(inStack.pop());}}
Queue :
Queue is an another type of data structure, the way of storing and retrieving the data from queue first in and first out.
The major operations performed on Queue are :
- Enqueue : Adds the item to queue
- Dequeue : Removes the item from queue
- Front : Item at first index
- Rear : Item at last index
Wednesday, November 29, 2017
Wifi debugging in Android Studio
Intellij and Android Studio plugin are created to quickly connect your device over wifi to connect to install, run and debugging without using USB connected.
Here are steps to install plugin to Android Studio
> Click on Android Studio from top right corner
> Click on Preferences, Opens up new window manager
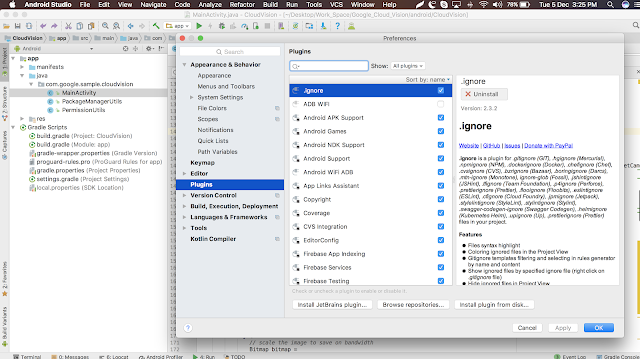
> Click on Plugins > Click on Browse repositories search as ADB wifi
> Tap on install button, once install's successfully, it show up new icon for Wifi ADB.
> Your phone will get detected and get's connected over wifi/hotspot and hence now you may disconnect USB.
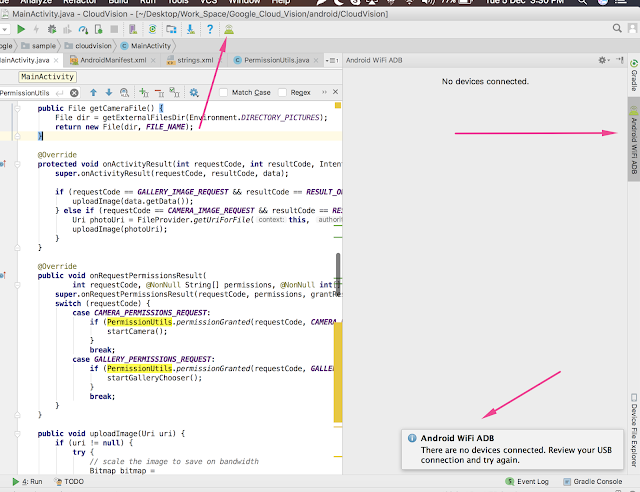
>It will save our time in irregular connection and also remedy for short length USB cable.
Here are steps to install plugin to Android Studio
> Click on Android Studio from top right corner
> Click on Preferences, Opens up new window manager

> Click on Plugins > Click on Browse repositories search as ADB wifi
> Tap on install button, once install's successfully, it show up new icon for Wifi ADB.
> Your phone will get detected and get's connected over wifi/hotspot and hence now you may disconnect USB.

>It will save our time in irregular connection and also remedy for short length USB cable.
Sunday, November 19, 2017

Thursday, November 16, 2017
FileProvider in Android Nougat
FileProvider is a special sub-class of ContentProvider class helps in secure sharing of files associated with an app by creating a content:// Uri for a file instead of a file ://Uri
A content Uri allows you to grant read and write access using temporary access permission. When you create an intent containing a content URI, in order to send the content URI to client app, you can also call intent.setFlags() to add permissions. This permissions are available to client app as long as the stack for a receiving Activity is active. For an intent going to a service , the permissions are available as long as the service is running
A content Uri allows you to grant read and write access using temporary access permission. When you create an intent containing a content URI, in order to send the content URI to client app, you can also call intent.setFlags() to add permissions. This permissions are available to client app as long as the stack for a receiving Activity is active. For an intent going to a service , the permissions are available as long as the service is running
Defining a FileProvider
Since the default functionality of FileProvider includes content uri generation for the file, you don't need to define a subclass in code. Instead you can include a fileprovider in your app by specifying it entirely in XML.
android:name attribute of the <provider> element
android:authorities > set to a URI authority based on domain you control;
if you use the same authorities for different apps, while installing it may through an exception to uninstall existing app which has same authority
android:exported > set to false, File provider does not need to be public
android:grantUriPermissions > set to true, to allow you to temporary access to files.
If you want to override any of the default behaviour of FileProvider methods, extend the FileProvider class and use the fully qualified class name in the<manifest> ... <application> ... <provider android:name="android.support.v4.content.FileProvider" android:authorities="com.mydomain.fileprovider" android:exported="false" android:grantUriPermissions="true"> ... </provider> ... </application> </manifest>
android:name attribute of the <provider> element
android:authorities > set to a URI authority based on domain you control;
if you use the same authorities for different apps, while installing it may through an exception to uninstall existing app which has same authority
android:exported > set to false, File provider does not need to be public
android:grantUriPermissions > set to true, to allow you to temporary access to files.
Specifying Available Files
nt A file provider can only generate content URI for files in directories that you specify beforhand<paths xmlns:android="http://schemas.android.com/apk/res/android"> <files-path name="my_images" path="images/"/> ...</paths>
Monday, October 30, 2017
Whats new in Android Studio 3.0
Android Studio is the official tool for developing Android applications, includes everything we need.
To get the latest version of android studio click Help > Check for update (on Mac, Android Studio > Check for updates).
If you're the MAC user you'll face the following issue, just click cancel and continue.

The primary purpose of the 3.0 is to improve the build performance for that projects which have a large number of modules. When using this plugin with large project. you should experience the following updates
- Support for android 8.0
- Support for building separate APKs based on language resources.
- Support for Java 8 libraries and Java 8 language features (without the Jack compiler).
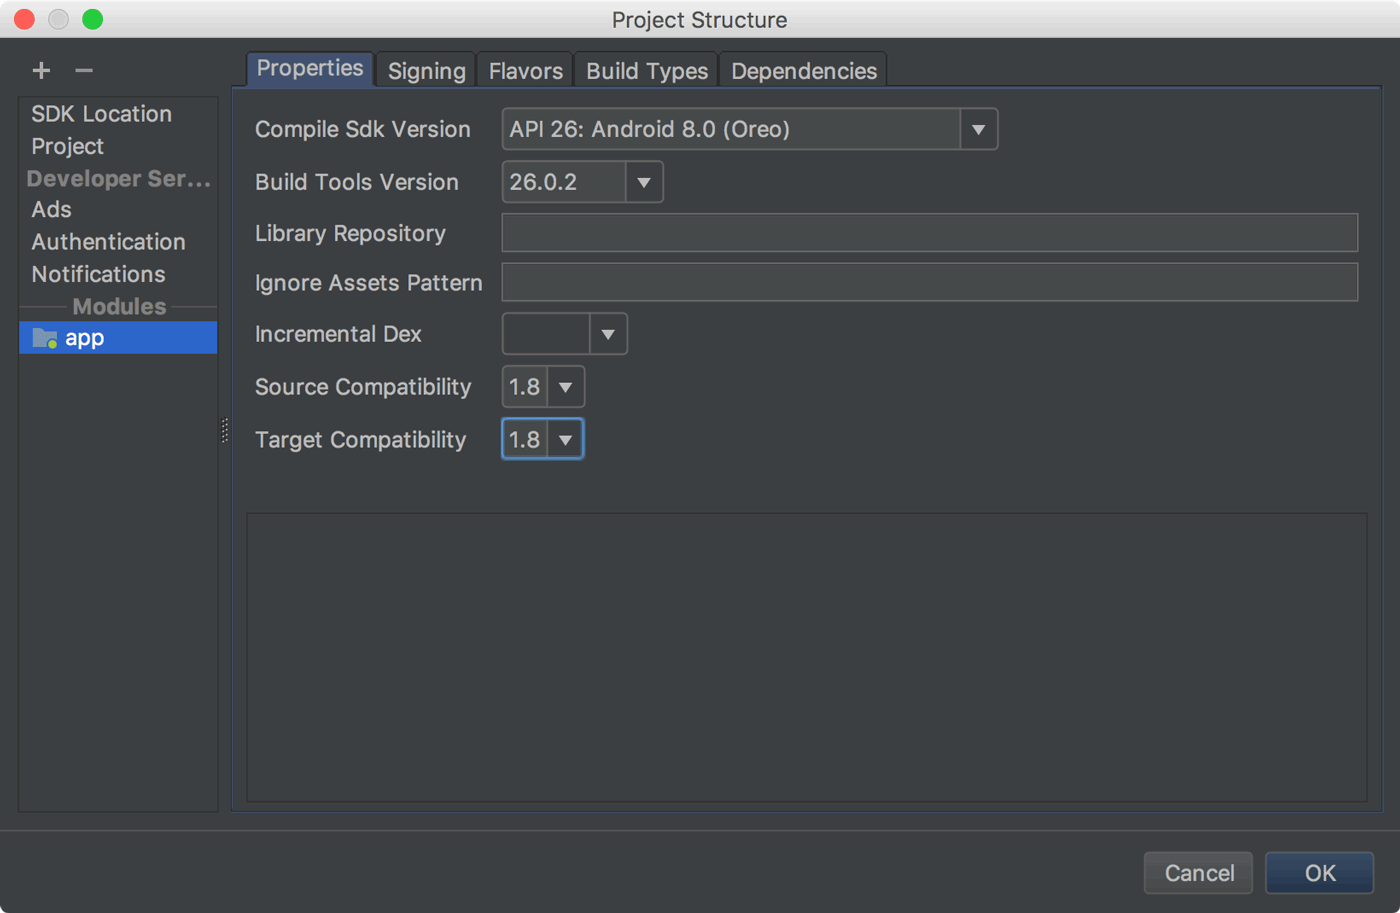
- Improved Gradle Sync speed
- AAPT2 is now enabled by default in
- Kotlin Support
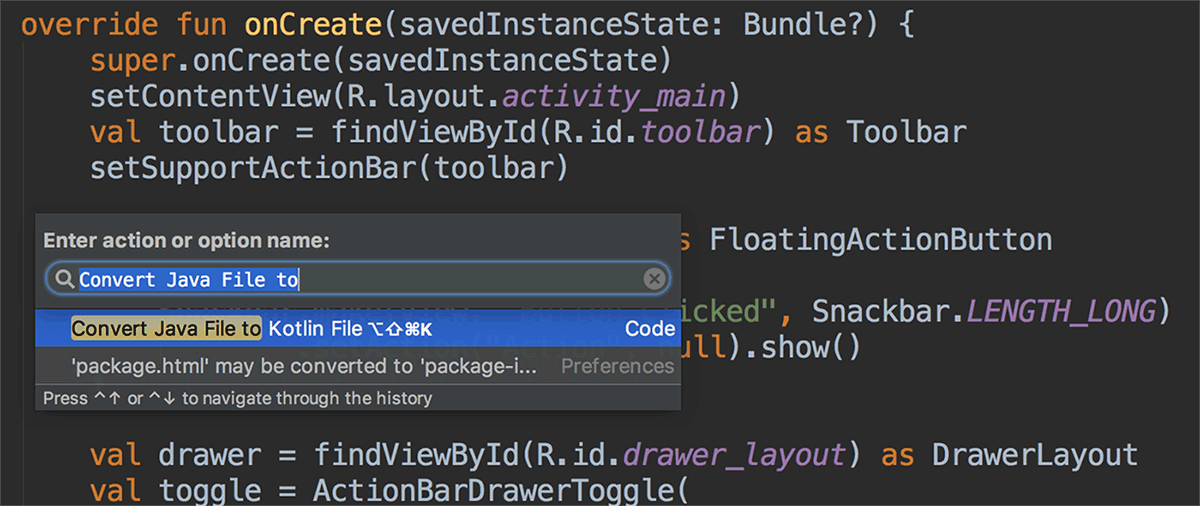
- Supports the device file explorer
To open click View > Tool Windows > Device File Explorer.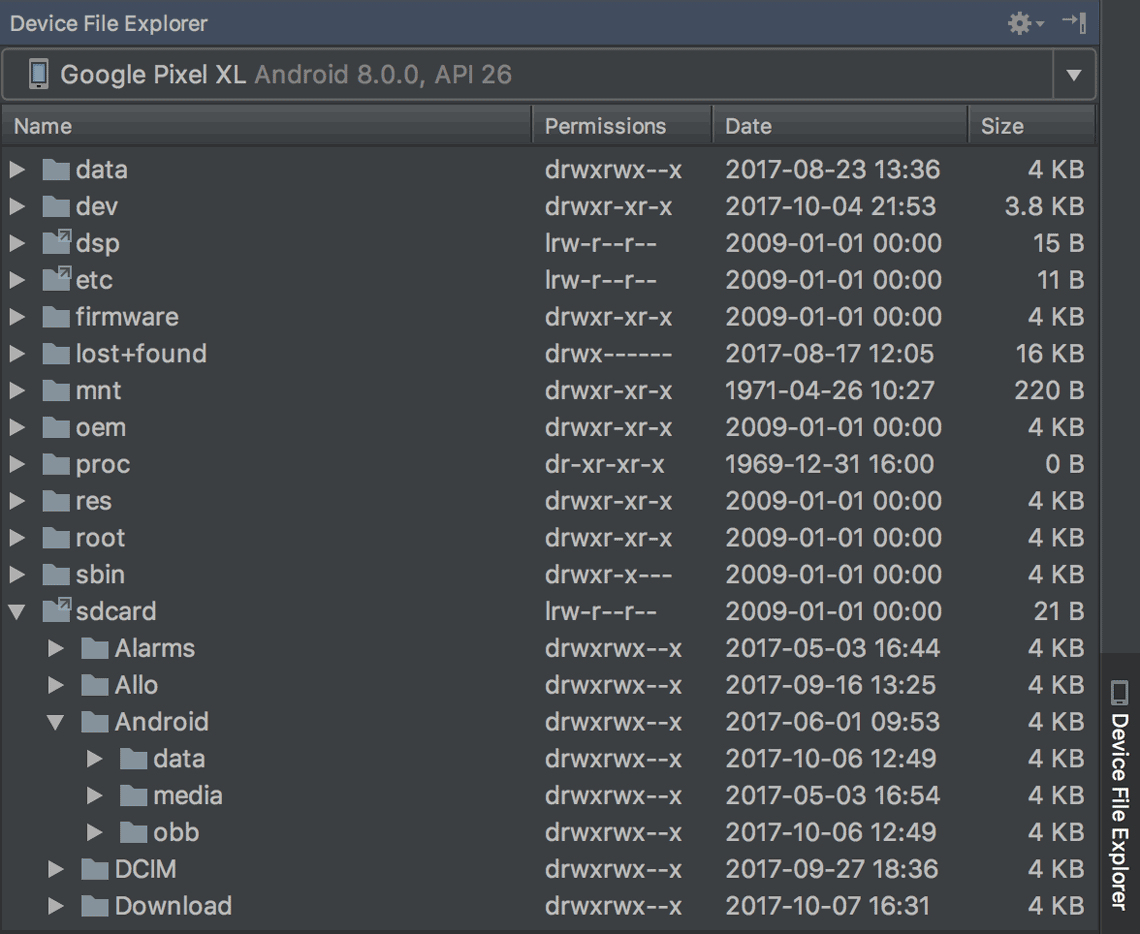
- Supports developing intant apps
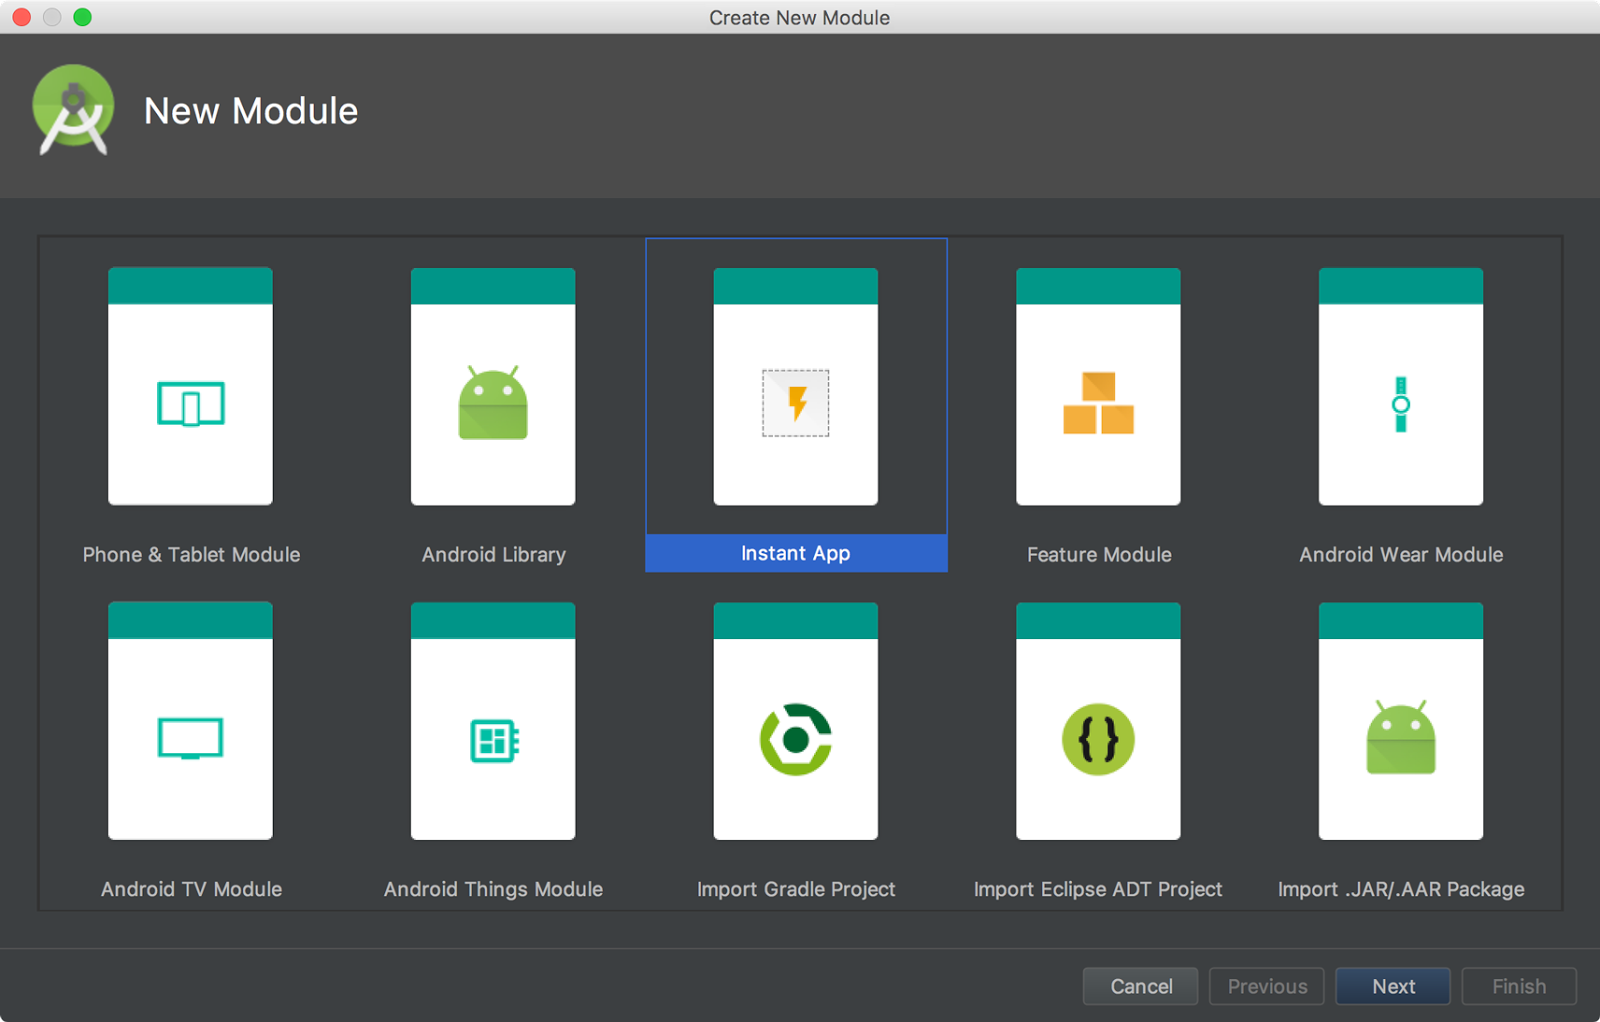
- Supports the adaptive icons for launching the androids apps in 8.0
to start, right-click on the res folder in your project, and then click New > Image Asset. In the Asset Studio window, select Launcher Icons (Adaptive and Legacy) as the icon type.

- Supports for font resources, you can choose various inbuilt font resources for your Android projects, instead of adding manually onto font folder
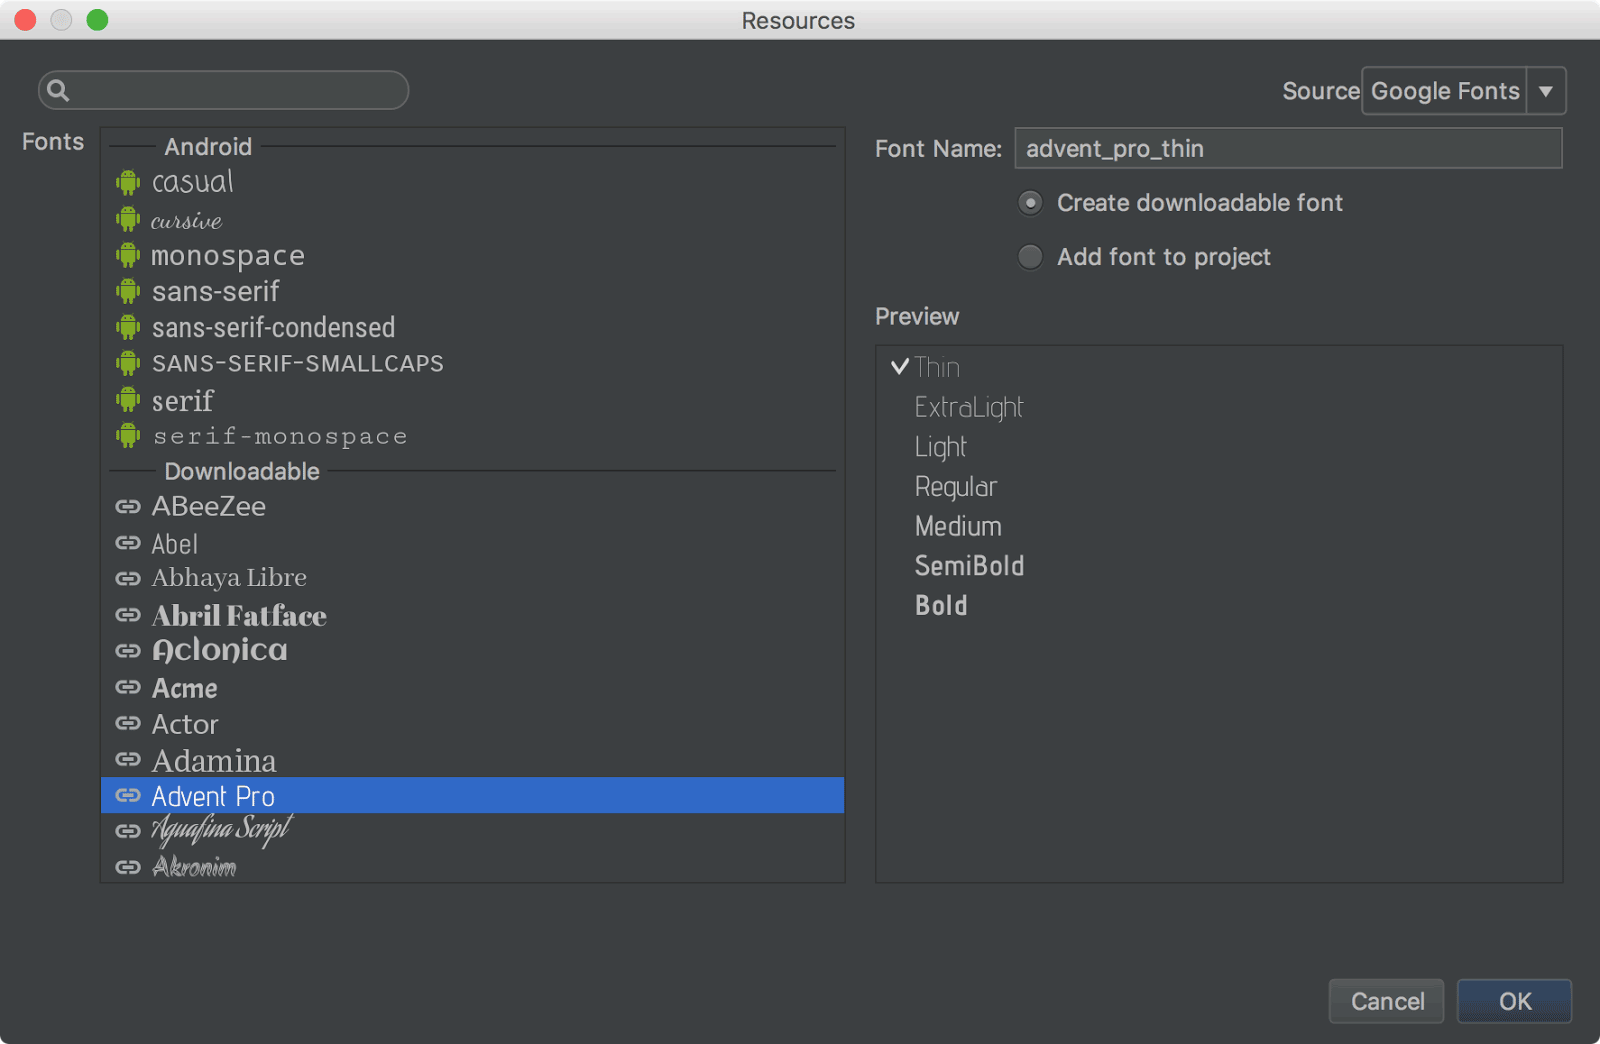
- Added Google Moven repository./
Android studio now uses Google's moven repository by default instead of depending on Android SDK manager to get updates for Android support library, Google play services, Firebase and other dependenciesallprojects { repositories { google() } } - Native debugging with windows-32 no longer supports.
in case if developers chooses to debug apps using window-32 they can use Android Studio 2.3.
Wednesday, October 25, 2017
Fingerprint Authentication

Android 6.0 Marshmallow offers new features for developers and user. This post will help developers to teach how to add Fingerprint authentications to apps.
There are several advantages of using the fingerprint authentications
> Fast and easy to use
> Secured : fingerprint uniquely identifies
> Online transactions are safer
> Online transactions are safer
There are several steps you have to follow before using fingerprint, It could really seems quite complex but this post help you step by step.
* Verify that lock screen is secured by PIN, password or pattern
* Check at least on fingerprint is registered on your phone
* Get access to android keystore to store the key used to encrypt or decrypt an object
* Generate an encryption key and the cipher
* Start the authentication process
* Implement callback methods to handle authentication event
Pre-requisites Android SDK 26
Android build tool v26.0.1
Android support repository
Before starting our app should get permission to access the sensor and fingerprint from android core, It can be done by just adding permission tag in manifest.xml file
<uses-permission android:name="android.permission.USE_FINGERPRINT" />
FingerprintAuthenticationDialogFragment.java
Small helper class to manage text/icon around fingerprint authentication UI.


